Web Widgets allow you to put a click-to-call phone button directly on your website. Visitors can tap the button to speak with your voice agents immediately inside their browser, utilizing WebRTC for ultra-low latency without dialling a telephone number.
Web Widgets Screen (Light)

Managing Widgets

Creating a Widget

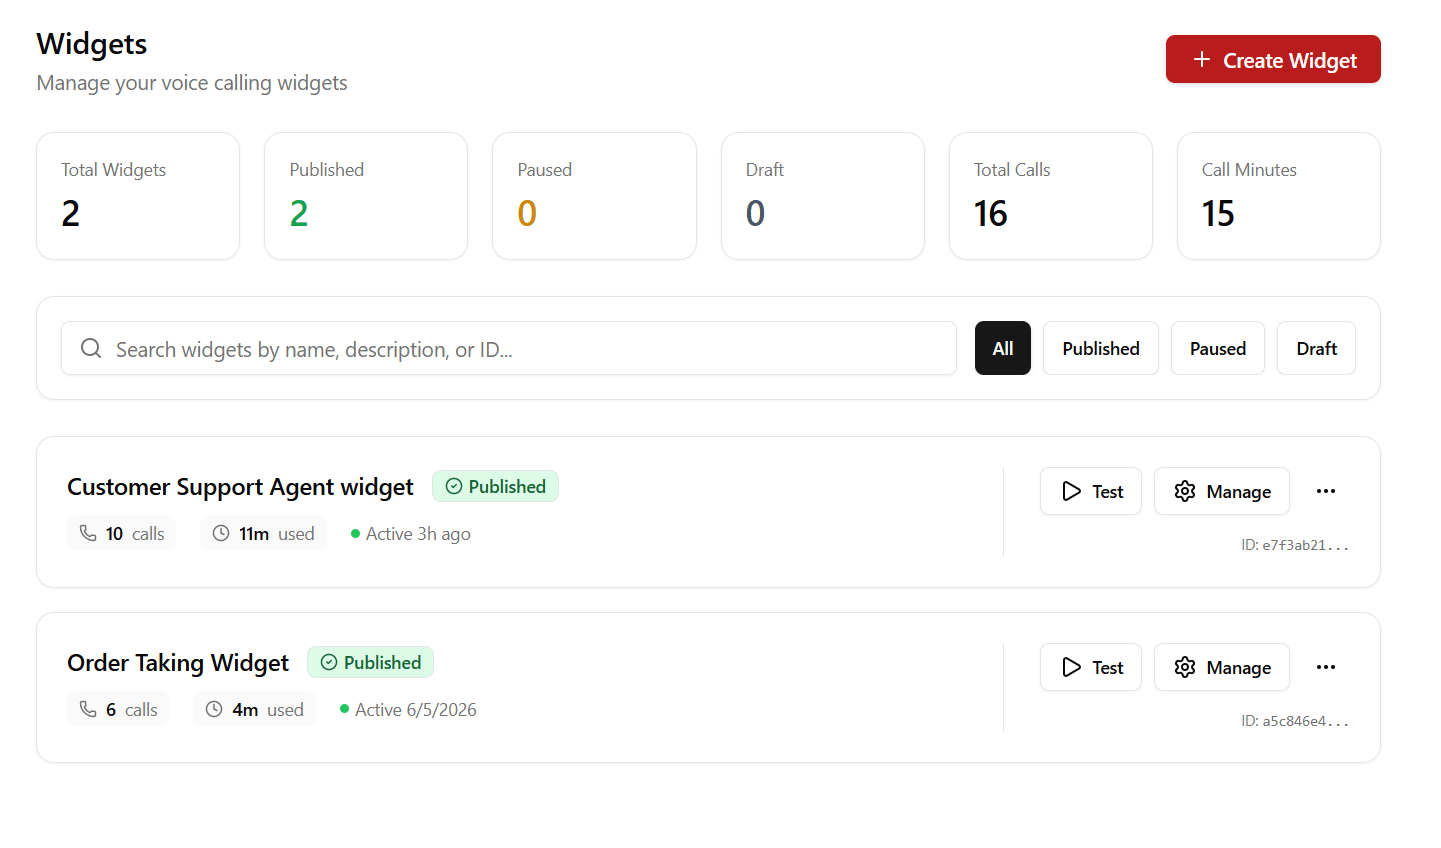
  1. Navigate to the Widgets tab in your dashboard.
  2. Click Create Widget.
  3. Choose the target Voice Agent or Restaurant Worker to handle calls from this widget.
  4. Customize the name, description, and status settings.

Testing in the Playground

Before pasting embed snippets into production sites, you can click Test Widget on any row to open the browser calling simulator, verifying that microphone access and conversation flows operate correctly.

Integrating onto Your Website

To deploy your widget, copy your Widget ID and copy one of the embed codes below. Replace YOUR_WIDGET_ID and YOUR_API_KEY_HERE with your actual credentials.

1. HTML / JavaScript

Place this script snippet right before your closing </body> tag:
<script src="https://cdn.roostrr.me/widget.js"></script>
<script>
  window.addEventListener('load', function() {
    if (window.Roostrr) {
      window.Roostrr.init({
        widgetId: "YOUR_WIDGET_ID",
        apiKey: "YOUR_API_KEY_HERE",
        theme: "auto",
        primaryColor: "#DC2626",
        iconColor: "#ffffff",
        position: "bottom-right"
      });
    }
  });
</script>

2. React

Create a custom component to inject the script:
import React, { useEffect } from 'react';

export default function RoostrrWidget() {
  useEffect(() => {
    const script = document.createElement('script');
    script.src = "https://cdn.roostrr.me/widget.js";
    script.async = true;
    script.onload = () => {
      if (window.Roostrr) {
        window.Roostrr.init({
          widgetId: "YOUR_WIDGET_ID",
          apiKey: "YOUR_API_KEY_HERE",
          theme: "auto",
          primaryColor: "#DC2626",
          iconColor: "#ffffff",
          position: "bottom-right"
        });
      }
    };
    document.body.appendChild(script);
  }, []);

  return null;
}

3. Next.js

Use the Next.js Script component to load the script after the page is interactive:
"use client";
import Script from 'next/script';

export default function RoostrrWidget() {
  return (
    <Script
      src="https://cdn.roostrr.me/widget.js"
      strategy="afterInteractive"
      onLoad={() => {
        if (window.Roostrr) {
          window.Roostrr.init({
            widgetId: "YOUR_WIDGET_ID",
            apiKey: "YOUR_API_KEY_HERE",
            theme: "auto",
            primaryColor: "#DC2626",
            iconColor: "#ffffff",
            position: "bottom-right"
          });
        }
      }}
    />
  );
}

4. WordPress

  1. Download the Roostrr WordPress plugin from your dashboard resources.
  2. Upload and activate the plugin inside your WordPress Admin.
  3. Go to Settings > Roostrr in your admin panel.
  4. Input your Widget ID and API Key.
  5. Save changes. The widget will render automatically on all public pages.